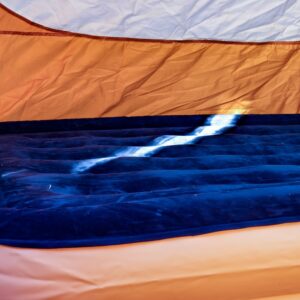
When you’re camping, one of the last things you want to hear, see, or worse yet, feel, is water dripping inside your tent. If you’ve been unlucky enough to endure this terrible experience, you probably already know the importance of waterproofing your tent.
How do you know if your tent needs to be waterproofed? Simple. Does it hold water instead of allowing it to bead off? Does it leak? Make sure you aren’t confusing leaks with condensation, and always store your tent after it has completely dried.
Luckily, understanding how to waterproof a tent is easy once you follow our step-by-step guide. You can also check out this handy video for more step-by-step tips.
1. Get your conditions right
Start by checking the forecast. You really need to waterproof your tent outside, and the tent may need to stay out for a while in order to dry. You should pitch the tent, but you only need to pitch the outer portions as this is the only part that needs to be waterproofed. Keep in mind that your tent should be clean and that it can be tough to get waterproofing materials off your hands or clothes.
2. Seal the seams
Once you have your tent set up, check all the seams and poles for damages. Most tents come with pre sealed seams, but these can wear out over time. If you find a seam that seems to be leaking, they are easy to fix.
First, if you find seam tape that has come loose on the bottom of the fly, remove any peeling sections. You can leave the good sections in place. Clean the seams and then apply a seam sealer. If you notice one seam that is beginning to leak, it might not be a bad idea to apply seam sealer to all the seams to get ahead of the game. Make sure you let the seams dry completely before moving on.
Click here to check out my article “Best Tent Seam Sealers for Dry Camping “…
3. Refresh the coating of the tent
If there is material flaking from the inside of the rainfly or onto the floor of your tent, it’s time to apply a new urethane coating. Start by removing your rainfly and laying it flat on the floor. Scrub the flaking coating off, and then apply a coating of tent sealant. Let it dry for at least 24 hours.
4. Renew the durable water repellent coating
If rain has stopped beating up on your fly, you can easily refresh the durable water repellent coating. All you need to do is spray the rainfly with clean water and then apply the waterproof spray over the rainfly. Let it rest for a few minutes, then wipe down any excess coating with a damp cloth. Let the rain fly dry completely before packing it up.
You may need to go through these steps a couple of times in order to see results. This is particularly true if you are planning on camping in an area that gets lots of rain, or if your tent has already started to show signs of leaking.
Follow these tips, and you’ll stay dry on your next camping adventure.